How to Use Unity Game Engine: A Beginner’s Guide
Unity is one of the most popular game engines, enabling developers to create stunning 2D, 3D, and VR/AR games. Whether you’re a beginner or an experienced developer, Unity provides powerful tools and an intuitive interface to bring your ideas to life. Here’s how to get started:
Download and Install Unity
Visit the Unity website and download the Unity Hub. This application manages your projects and installations. Choose the version suitable for your needs and install any additional modules like Android or iOS build support if required.Create a New Project
Open Unity Hub, click on “New Project,” and select a template (e.g., 3D, 2D, or URP). Name your project and set a save location.Familiarize Yourself with the Interface
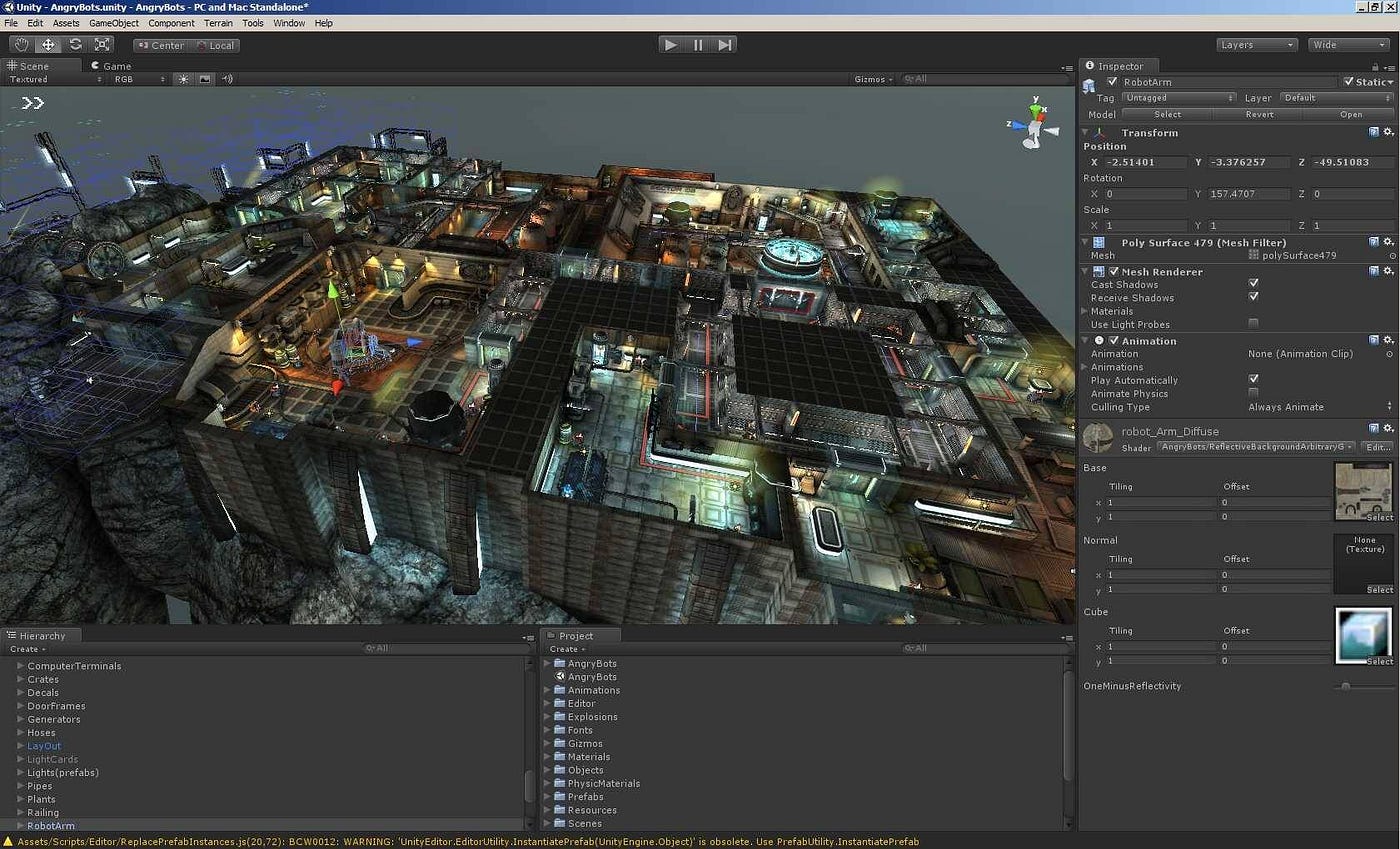
The Unity interface consists of key panels:- Scene View: For designing and arranging game elements.
- Game View: To preview your game.
- Hierarchy: Lists all objects in your scene.
- Inspector: Displays properties of selected objects.
- Assets Folder: Stores your game files, scripts, and textures.
Add Game Objects
Use the toolbar to add objects like 3D models, sprites, or terrain. You can import free or paid assets from the Unity Asset Store to speed up development.Write Scripts
Unity uses C# for scripting. Create a new script, attach it to a game object, and edit it in an integrated development environment like Visual Studio.Test and Build Your Game
Press the Play button to test your game in the editor. Once ready, build your game for your target platform using the “Build Settings.”
Unity’s vast community, tutorials, and resources make it a fantastic choice for developers of all levels. Start experimenting and bring your creative visions to life!
